Step 1 First thing we need to do is create a new document. I set my background to black to that I can see the white glint that we will prepare. Create a new layer and choose the line tool (Hidden under the rectangle shape tool in the toolbox) Choose 2 pixels and the draw pixel option from the options bar Step 2 Set white as your foreground color and draw a short dash (A) Hold the Shift key to constrain the rotation to a horizontal line Choose Filter>Blur>Motion Blur as shown in (B).
20 Sets Of Free High Resolution Sunburst Brushes For Photoshop Advertisement Photoshop is the leading and amazing designing software for all web designers,graphic designers and of course for photographers.Whether you create a web design or a digital art,Photoshop offers very useful and effective tools to make the design process simpler.
Add enough distance to get a nice tapered look. Make sure the angle matches the angle of the line. Step 3 Duplicate the Layer with the dash on it Press Ctrl (Windows) /Cmd (Mac) +T for free transform Rotate the dash while holding down shift to constrain the rotation Step 4 Choose both dash Layers and press Ctrl/Cmd+E to merge them. Careful not to merge with background Duplicate the merged dash layer (Ctrl/Cmd+J) Press Ctrl/Cmd+T for free transform Rotate 45 deg, grab a corner point and scale toward the center to make the new star smaller (hold down alt/option+shift to scale from center and constrain) Step 5 You now have your starburst and you may be happy right here. For those of you who want to add a lens flare to the starburst continue Create a new Layer Grab the elliptical marquee tool (circular selection tool) Create a selection over the starburst Step 6 Choose Edit>Stroke Choose a 1 pixel white stroke Deselect Choose Filter>Blue>Gaussian Blur to soften the effect Click ok and we’re all done!
Step 7 Merge the layers together to use on your illustrations and photos. Note: You can save them as a smart object, or add them to your creative cloud Library if you have cc. Flatten the whole thing, choose Ctrl/Cmd+I to inverse and then make a selection around the starburst. Choose Edit>Define Custom Brush. If you want to get tips and tutorials in your inbox, no more than once a week, sign up here (also get the free super guide).
Photshop has hundreds of tricks up its sleeve if you know where to find them. This technique will show you how to recreate a starburst filter effect. Words and Step-by-Step pictures Peter Bargh Original from Hemera Photo Objects disc. Black theme for gimp mac.
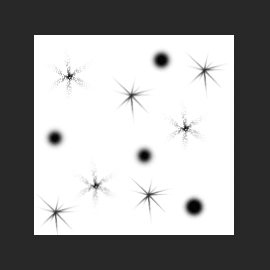
A sparkling highlight can be added to any object with this technique, although you'll find it will look more natural if you choose a subject that has a reflective surface that would normally have shiny highlights, such as this silver candle holder. Other potential subjects would be jewellery, street lights, car headlights and shimmering reflections in water. But you could go for the corny approach and have a twinkle in an eye or on teeth for a Colgate white smile. The idea is to choose a subject where the star will look fairly natural and not contrived. The star shape should be selected from the brushes palette.
If you are on the default set click on the little arrow top the right of the menu and load the Assorted set. From there you have four preset starburst brushes and each can be edited to make them bigger or smaller and have different styles. I've chosen Starburst -Large for this project. With the desired brush selected.
Pc emulator on mac os x. Click on the colour picker and choose a suitable tone. I went of an off white that had a small amount of yellow so it has a warm sparkle. Move around the photo clicking on areas where you want a burst to appear. Do not drag as this would paint a succession of stars.
Choose areas with natural highlights and don't go over the top. Edges always seem to look good with a burst. You can change the brush size if you like to vary the effect. At this stage you could leave the photo and consider the job done, but, in the words of Chris Tarrent, 'we don't want to do that'. Let's look at how these starburst can be made to glow like a rainbow. Go back to the original candlestick and create a new blank layer.
Select the Star brush again. Paint several stars on to the new layer Now hold down the Control Key as you click on it. This places a selection around the stars that you may not see if the stars are small. Select the Gradient Tool (Keyboard shortcut G) and select the Spectrum Preset - the one that looks like a rainbow - from the choices that appear.
Click at the top of the image or bottom and drag to the other side to place a gradient colour on the stars. You can do each star shape individually if you prefer each star to be multi coloured. This effect is a bit too strong and over powering so select the Screen blend mode and set to about 60% Opacity.