Apple's addition of the function to iOS 11 made it extremely easy for people to create video guides for sharing online and with relatives, to visually walk them through app functions. The function is also useful for capturing proof of bugs in apps to provide to developers, and on the more frivolous side, recording moments of gameplay for 'Let's Play' videos on YouTube.
For most people, this is good enough for their needs, but there are some cases where you may want to go down a different route. For example, people making online video guides may not want to have the obvious red bar at the top of the screen when they are capturing footage.
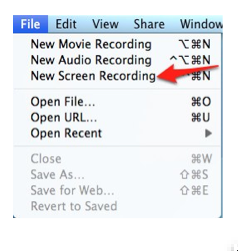
Conditional formatting in excel for mac. One answer to that is to record the screen on a different device, keeping the iPhone or iPad's display normal and free of visual clues that there is a video being recorded. To do this, all you need is your iOS device, a Lightning-to-USB cable, and a Mac equipped with QuickTime Player. Despite the 'Player' section of the name, it is a handy tool for capturing audio from a microphone,, and from an external video source, with the latter also including iPhones and iPads. Setting Up the Recording First, connect your iOS device to the Mac using the Lightning cable. If any applications load automatically when you established the connection, close or minimize those apps now. Open QuickTime Player, which can be found in the Applications folder, through Launchpad, and a number of other ways.
A dialog box to open a file will usually appear, which can be dismissed by clicking Done without selecting a file. During and ending Recording While the recording is taking place, the media controls for QuickTime Player will show how long the video has run for, as well as how big the current file size is, as well as a volume control and the stop button. Note that there is going to be some lag between the action on the iPhone or iPad and the Mac's view. At this point, it is best to keep an eye on the video feed to make sure it's showing how you want it to appear, and that it is still recording. When you have finished recording all that you require, click the stop button.
Jump to Part 3: How to Check and Update QuickTime - Part 3: How to Check and Update QuickTime. The version of QuickTime your Mac is running will. This webpage has content that requires the “QuickTime” plug-in. If you click on “More Info” it just takes you to a generic page saying that QuickTime is built into Mac OS X.
Quicktime will then switch to its usual Play mode, allowing you to review what was captured. The resulting.MOV file can then be used as part of a video project, sent to friends or family, or simply uploaded to your preferred video hosting service if no editing is required.
Extra Credit The live view can be useful as a second screen when demonstrating something on the iOS device as part of a presentation. Click the green maximize button at the top-left of the QuickTime window to make it fill the screen, and leave the mouse alone to allow the media controls to fade out. This same live view can also be used for streaming iPad gameplay on Twitch. Streaming software like OBS can be set to record from a window, so setting it to capture QuickTime Player as a video source will make the iOS device's display usable with other media sources. Lastly, not all apps will work normally when connected in this way.