Reformatting a Western Digital My Passport hard drive to function well on Windows and Macintosh systems is neither time-consuming nor technologically demanding. Back up all important information on the drive before beginning; any data left on the drive will be destroyed during the reformatting process. Once the WD Quick Formatter is finished reformatting the drive, the drive will only have one partition. This is necessary in order to optimize the performance of the drive. The WD Quick Formatter is the recommended way to format WD external drives that use Advanced Format Drives (AFDs). You would have to copy the data on your hard drive to your mac, then reformat it with the Disk Utility application. Click on the Erase tab, choose your external hard drive and select Mac OS Extended (Journaled) and then click Erase Then simply drag and drop your data onto your newly formatted disk. You may only want to erase, but not format, because formatting will delete everything,including the WD files that came on the disk; maybe even a WD a back up program you will want to use. You are best to erase/delete just the folders and files you put on the disk. Formatting my passport for mac. Click on the Erase tab in the Disk Utility toolbar. A panel should drop down. A panel should drop down. In the drop down panel set the partition scheme to GUID.
As Outlook 2011 Mac does not create Outlook 2011 file by default, you need to export Mac Outlook 2011 file format. Follow the steps and see how to create a Mac 20110 file.
Like some others scattered around the U.S. This past week, I took advantage of the Thanksgiving holiday to spend time with my family. To stay in touch I dutifully dragged along a MacBook Pro. When I returned, I wished to transfer its week’s-worth of e-mail to my desktop Mac. I’ve recently switched my e-mail client from Microsoft Entourage to ( ) and expected that moving a relatively small passel of messages would be as easy with Outlook as it was with Entourage—just drag the Past Week mailbox to the desktop to turn it into an MBOX file, transfer that file to my Mac Pro, and drag it into its copy of Outlook.
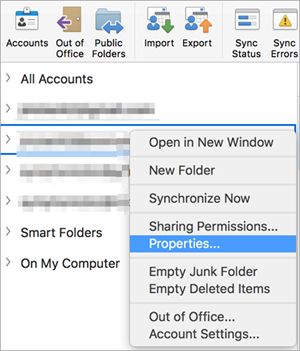
And that would have been a solid plan had Outlook supported views or the seemingly ubiquitous MBOX format. Regrettably, it doesn’t. Instead, when you choose the File -> Export command, you’re offered the single option to export mail in the Outlook for Mac Data File (.olm) format.
And—just as regrettably—you have to export all your mail. There’s no option to export a range of mail or single mailbox. In my case, this was a problem as I carry a lot of e-mail with me and exporting it would have taken longer than I cared to wait. With the Export command offering no comfort I explored selecting and dragging the messages I wanted. This appeared more promising.
When I selected that week’s-worth of e-mail and dragged it into a folder on the desktop, each message appeared as a.eml file. When I double-clicked on one of these files, Apple’s Mail opened and I was able to preview the message. However, I couldn’t drag any of them into Outlook. Unable to believe that Microsoft left no better avenue for moving messages from one copy of Outlook to another, I turned to Twitter (where I appear in the guise of ). In reasonably short order, one (Kyle DeMilo) provided the solution. When I double-clicked one of the.eml files and it opened in Apple’s Mail I should have taken the hint.
By default, these files are associated with Mail (Mail uses a.emlx rather than.eml extension for its messages, but it amounts to the same thing). In order to import the messages into Outlook 2011, you have to change their association. This I did by selecting one of the exported.eml files, pressing Command-I to produce the file’s Info window, choosing Microsoft Outlook from the Open With pop-up menu in this window, and finally clicking the Change All button. Having done this I created a Last Week's Mail folder in Outlook and dragged in the messages from the folder on the desktop.
There they appeared, complete with their attachments. Netflix app for mac reviews. So, to sum up in a few easy steps, to move messages from one copy of Outlook to another: • Create a folder on the desktop of the Mac you want to export from.
• Select the messages you want to export and drag them into the folder you created. • Transfer the folder to your other Mac.
• Select a.eml file, press Command-I, and change its association to Microsoft Outlook. • Select the transferred messages and drag them into Outlook.
Users might run into outlook related issues and face error messages for rebuilding identity or at times even not able to open the outlook altogether. In these scenarios, users would face difficulty migrating messages.
Even if they are able to migrate the messages successfully, some of the mails might be missing about which you would come to know later when you require them. This is because outlook at times is unable to export large emails sized database to OLM files. Many a times it might even crash while exporting and that too without any kind of error message and user believes that it has exported all the data to OLM files. Avoiding all these kind of problems is not possible without use of third party application. Because in these cases outlook itself is at fault and might not be able to export the database correctly. This is where Outlook Mac Database Recovery for Mac application comes into picture. It is a unique application capable of picking up the Outlook mails from database source itself and hence does not require intermediate OLM archives which are dependent upon Outlook.